Setting Up Risuai with NanoGPT
Want to use Risuai with NanoGPT? This guide walks through the full setup so you can start chatting with NanoGPT models inside Risuai.
Before You Start
- Create or log in to your NanoGPT account.
- Generate your API key at nano-gpt.com/api.
- Open risuai.xyz.
If Risuai shows an initial onboarding tutorial, skip it. NanoGPT is configured from the main app settings, not the onboarding flow.
Step-by-Step Setup
-
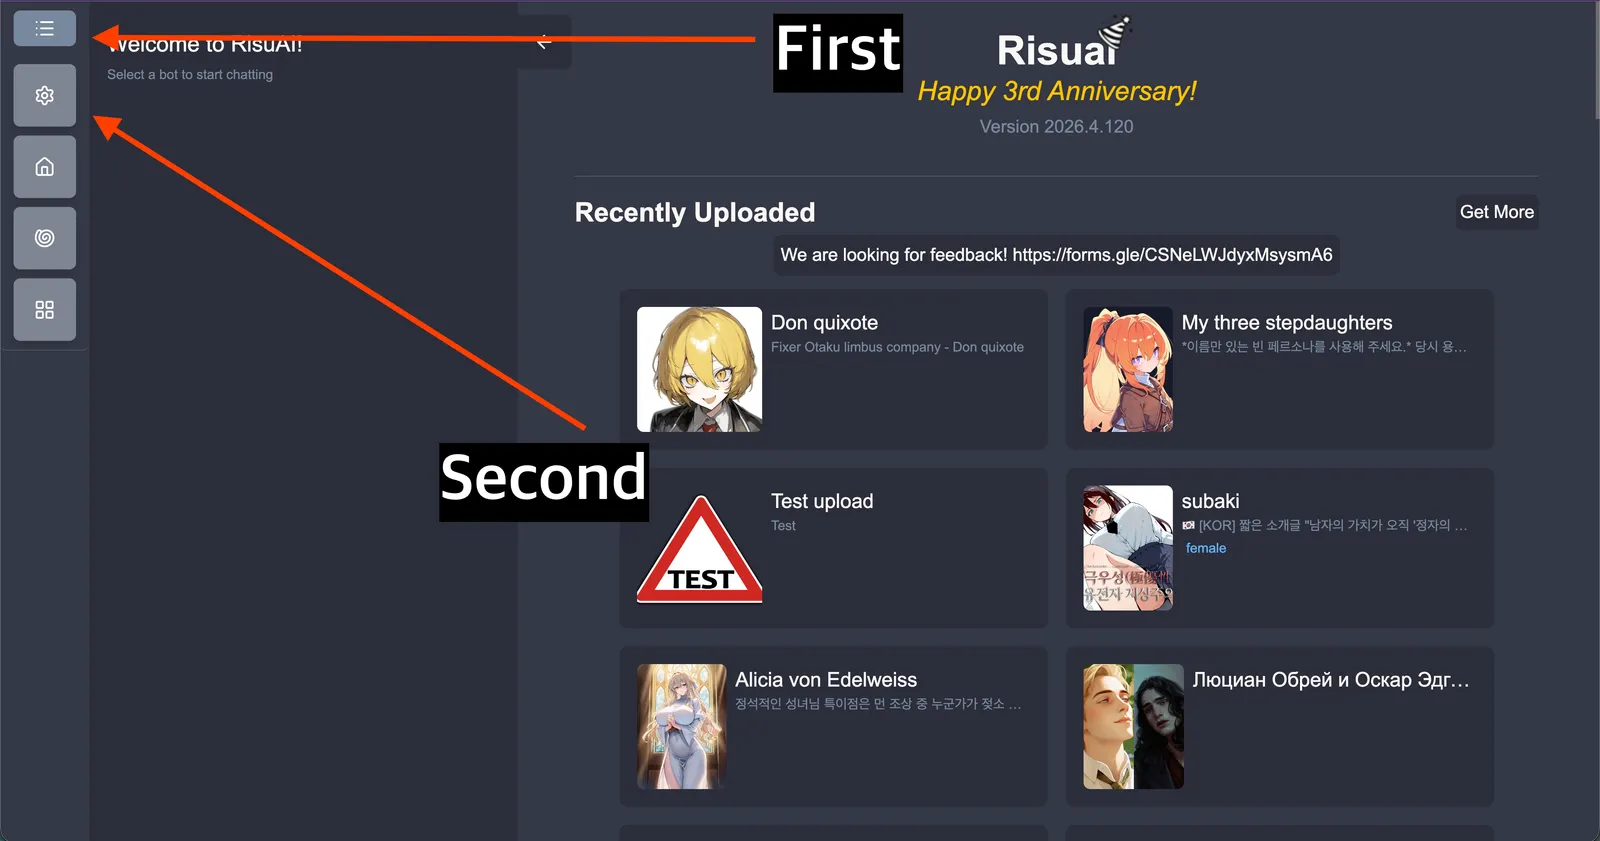
From the Risuai home screen, open the left menu (hamburger icon), then click Settings.
-
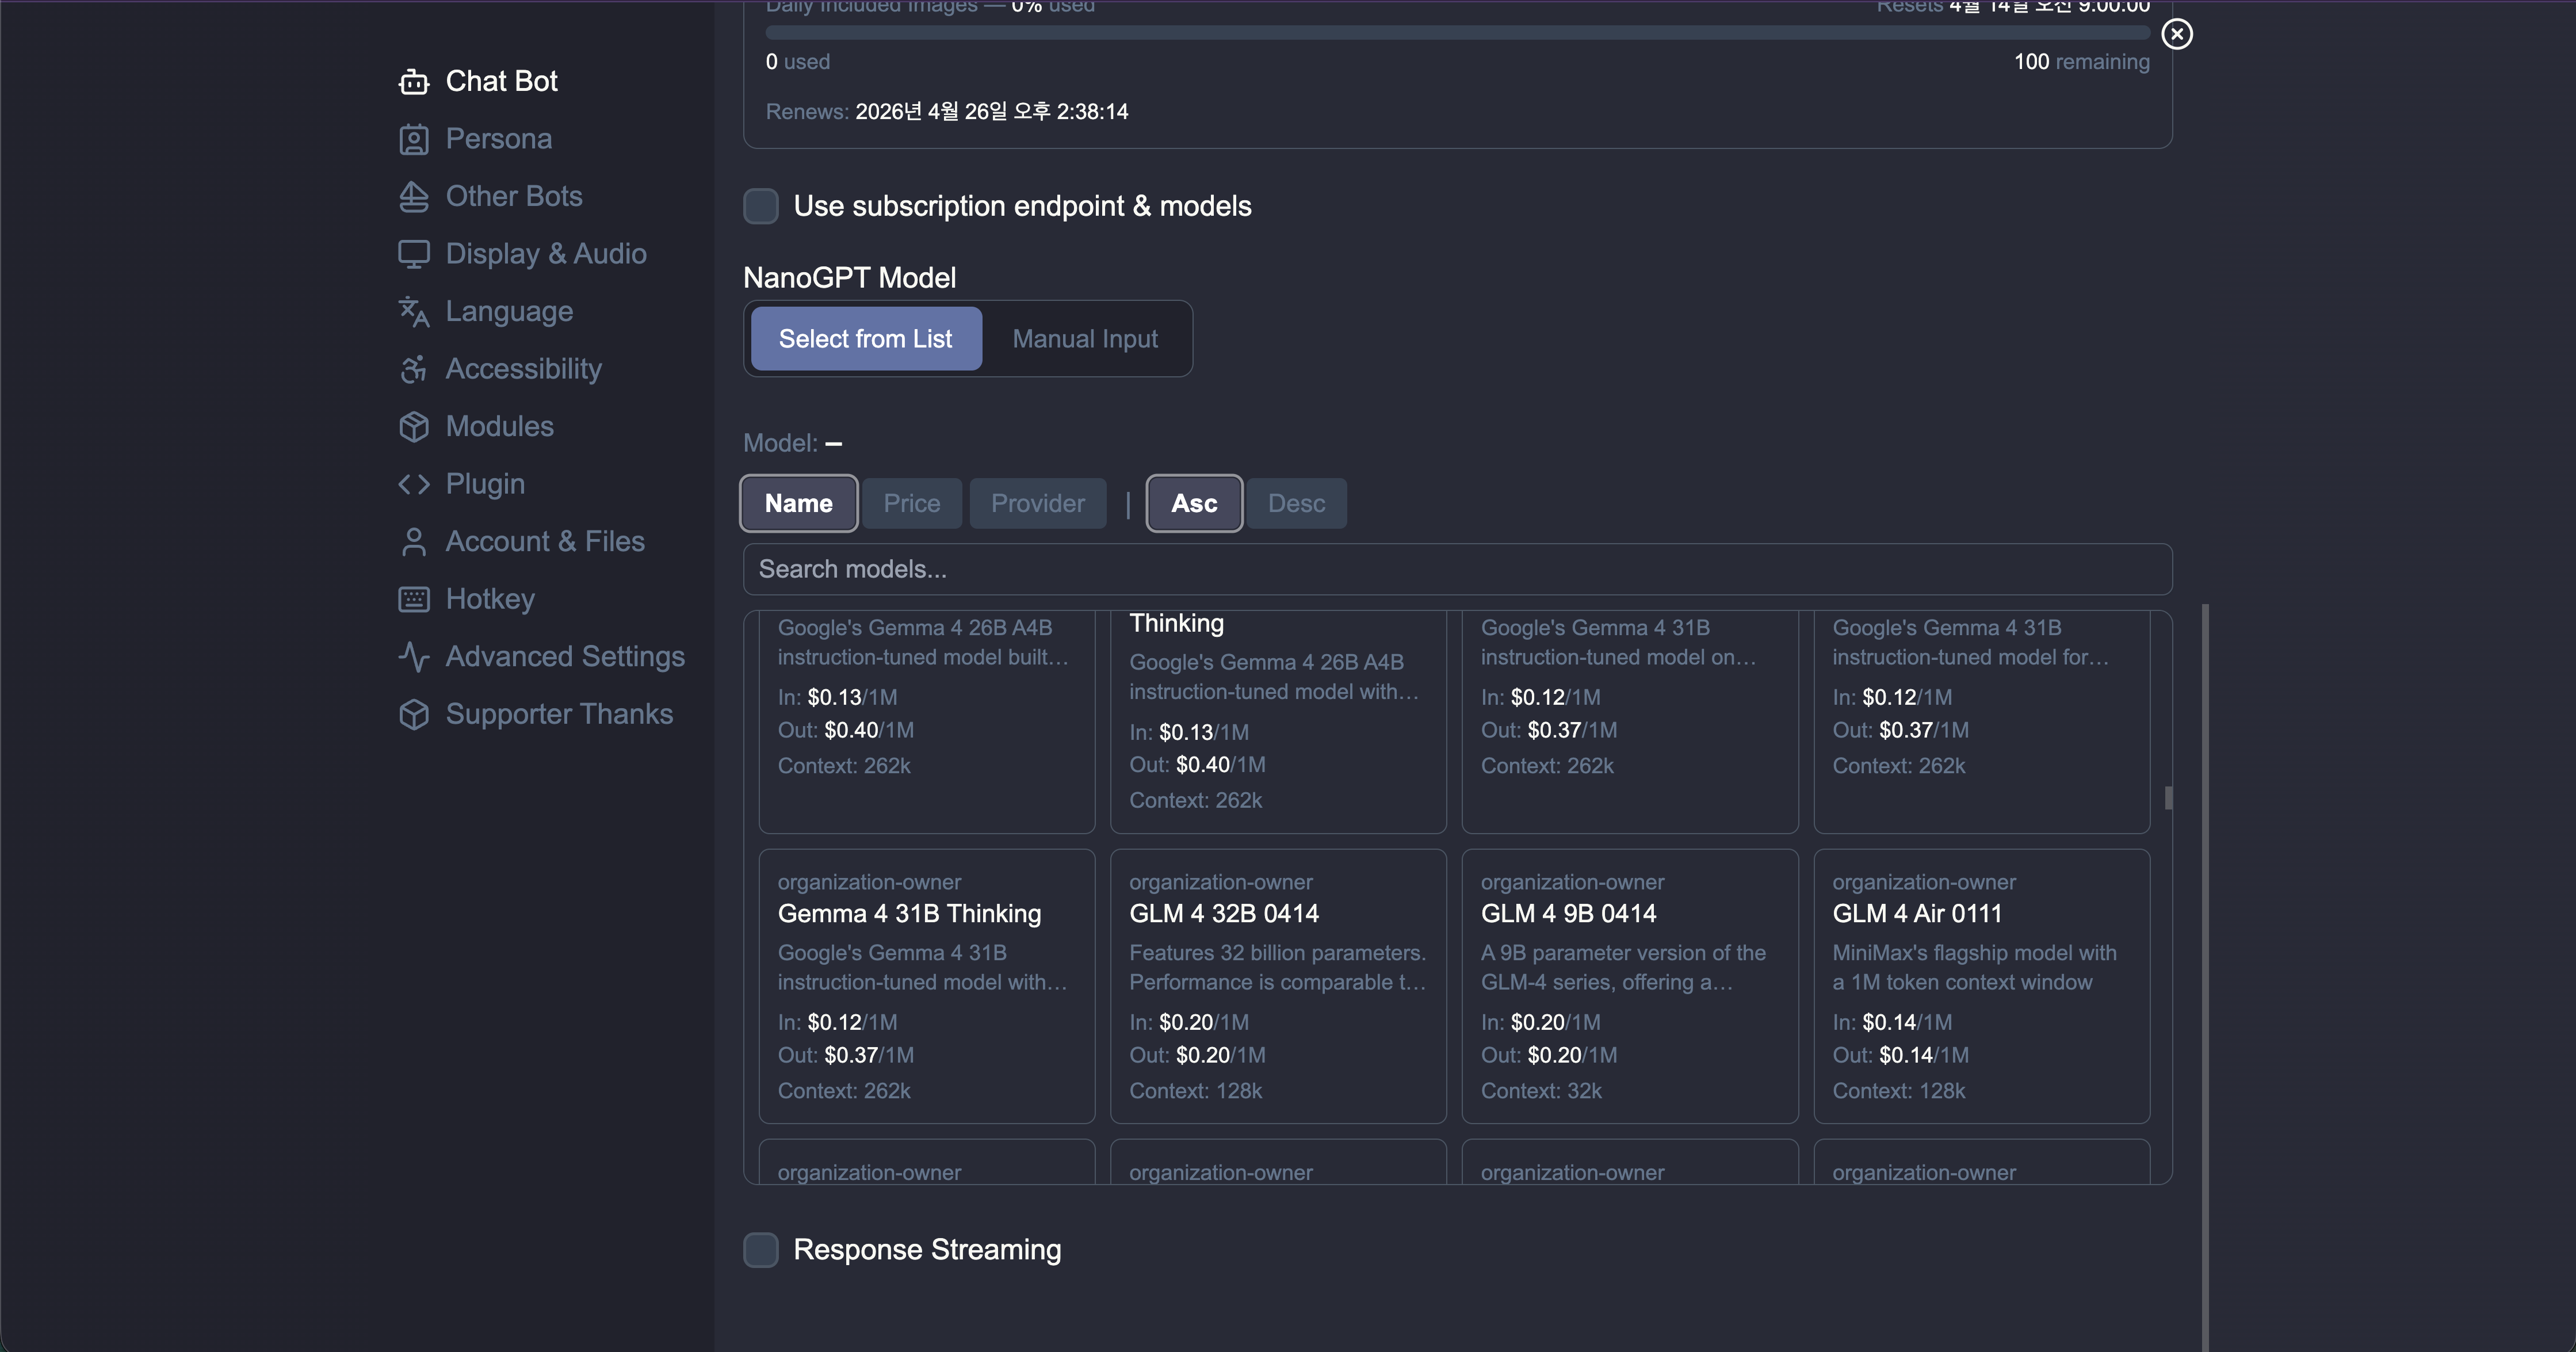
In Settings, open the Chat Bot panel.

-
Set both of these fields to NanoGPT:
- Model
- Auxiliary Model

-
Paste your key from nano-gpt.com/api into NanoGPT API Key.
-
If you have a NanoGPT subscription, enable Use subscription endpoint & models.
- If this is not enabled, Risuai uses pay-as-you-go mode by default.
- If this is not enabled, Risuai uses pay-as-you-go mode by default.
-
Choose your model in NanoGPT Model:
- Select from List to browse available models.
- Manual Input if the model list does not load or you want to enter a model ID directly.
-
Optional: enable Response Streaming for streamed output.
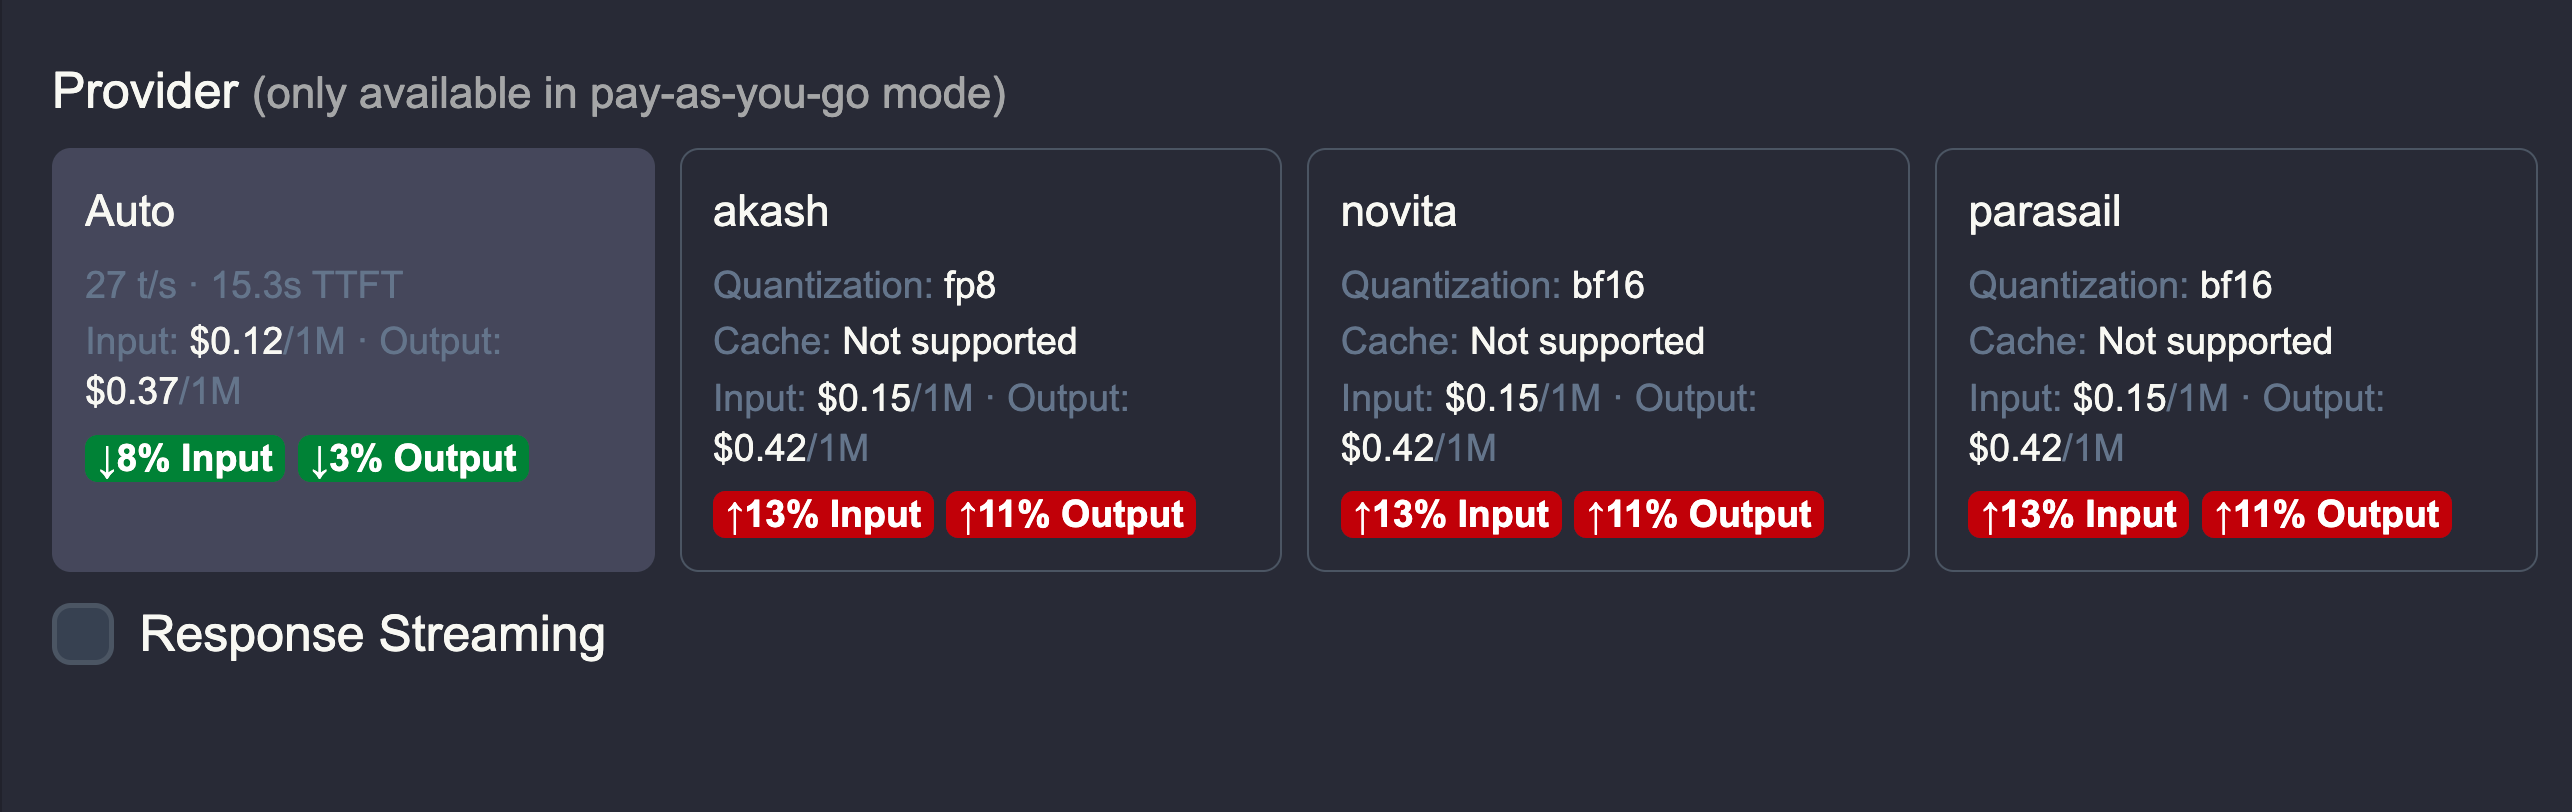
Pay-As-You-Go Provider Selection
In pay-as-you-go mode, some models expose multiple providers. Risuai will show provider cards with pricing so you can compare and choose the one you want.
Quick Troubleshooting
- Model list not loading: switch to Manual Input and enter the model ID.
- Unexpected pricing mode: verify whether Use subscription endpoint & models is checked.
- Auth errors: confirm your NanoGPT API key is valid and pasted without extra spaces.
That is all you need. Once saved, Risuai will route your chats through NanoGPT.